Deploy Session Host Configuration hostpools for Azure Virtual Desktop automated.
Deploy Session Host Configuration hostpools for Azure Virtual Desktop automated.
Hello! Welcome back to my blog. Today i want to talk about the new Session Host Configuration option for hostpools which you can now use and implement for Azure Virtual Desktop. I have already talked about this in an early post but that was focused on setting this up using the Azure Portal and what it can do for your organization. It think it will be cool to implement this in an existing Azure Virtual Desktop and do this automated.
Keep in mind that it is still in preview so not every option is available, but with some creativity we can come far in the automation proces. I hope you will enjoy the article, so let's start.
A little explanation about Session Host Configuration.
Session Host Configuration is an new option available but still in preview. You can only choose this option when you create the Hostpool, if you don't choose this option at the beginning, the setting will not be shown as en option in your current hostpool. for more explanation about the prerequisites i will advice you to read my earlier blog.
You could also use the new scaling plan Dynamic Scaling that's currently in preview when you choose to use the Session Host Configuration enabled Hostpool. I will explain more about that scaling plan in my next blog, but let us first talk about how we gonna set-up this Hostpool automated.
Current Situation.
In my current scenario I will do a demo based on an existing environment. I have a Azure Virtual Desktop environment already setup. I will use a Bicep file to create the Key-Vault and the deployment script will create the hostpool and necessary access rights.
In my bicep file i will call the existing resource group and deploy only the key-vault because I have the other resources already deployed. If you don't have this you can pick the avd.bicep file in my repository.
In the bicepparam file i have set the secrets containing the necessary information needed to domain join the machines and the local administrator en password for the session hosts when you are going to set-up your session hosts.
The deployment script we are using contains a couple of things let me break this down in steps:
- Deploy the bicep using the location where the .bicep and .bicepparam are located, it will end with an "what-if" command for some extra control steps.
- It will create the Hostpool and set the desired values.
- It will create the Workspace.
- It will create the Application Group.
- It connect the workspace to the application group and the hostpool to the application group.
- It will give the AVD App registration contributor in the resource group.
- It will give the Key Vault Secret User to the AVD App registration.
- It will give the Key Vault Secret User to the User that deploys this script.
- It will create the Session Host Configuration.
What do we need to do to deploy this.
There are a couple of things you need to do and think about when you want to adjust this let met tell you. Keep in mind that I am deploying this in one Resource Group that contains every resources needed for the Session Host Configuration, so if you are using a Virtual Network you need to set permissions for the Azure Virtual Desktop client registration as well.
Make sure you have the az.desktopvirtualization installed in powershell, if you want more information check the gallery.
Change the bicepparam files with the values you have for your own environment and of course, you can use your own naming convention for the hostpool, workspace and application group.
Make sure the Key-Vault name is exactly the same as the one you are using in your bicep deployment.
Keep in mind that the password and username you will put in the Key-Vault meet the requirements of Microsoft standards. For the domainAdminUser you need to set the full username like admin@demo.cloud.
When you have already a Key Vault deployed you can use this as well, but you need to set the secrets in the Vault by your self. For testing purposes I will set this up using the defaults, so it's not WAF alligned!
If you want to set the Key Vault WAF alligned here is a great example.
1//Parameters for the existing resource group.
2param existingResourceGroupName = 'rg-${productType}-${environmentType}-${locationShortCode}'
3
4//Parameters for the Key Vault
5param keyVaultName = 'kv-conf-${productType}-${environmentType}-${locationShortCode}'
6param domainAdminPass = ''
7param domainAdminUser = ''
8param vmadminPass = ''
9param vmAdminUser = ''
- Change the values in the powershell deployment script with the one your ar using in your environment:
1$resourceGroupName = "rg-$productType-$environmentType-$locationShortCode"
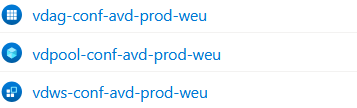
2$hostPoolName = "vdpool-conf-$productType-$environmentType-$locationShortCode"
3$workspaceName = "vdws-conf-$productType-$environmentType-$locationShortCode"
4$applicationGroupName = "vdag-conf-$productType-$environmentType-$locationShortCode"
5
6$vaultName = "kv-conf-$productType-$environmentType-$locationShortCode"
- Change the value where you have stored your Image you can change that under the CustomInfoResourceID.
- For the domainInfoJointype you can also use the 'AzureActiveDirectory' option when using Domain Services, more information can be found on the learn documentation.
- I found a little error in the documentation from microsoft the selection of which image you want to use is set by the ImageInfoImageType and not the ImagInfoType what is documented.
 1# Deploy Session Host Configuration
 2$parameters = @{
 3    FriendlyName                               = "avd-$environmentType"
 4    HostPoolName                               = $hostPoolName
 5    ResourceGroupName                          = $resourceGroupName
 6    VMNamePrefix                               = "avd-$environmentType"
 7    VMLocation                                 = $location
 8    SecurityInfoType                           = "TrustedLaunch"
 9    ImageInfoImageType                         = "Custom"
10    CustomInfoResourceID                       = "/subscriptions/$subscriptionID/resourceGroups/$resourceGroupName/providers/Microsoft.Compute/galleries/galavdprodweu/images/img-avd-prod-weu/versions/2025.01.18"
11    VMSizeId                                   = "Standard_D2s_v5"
12    DiskInfoType                               = "Premium_LRS"
13    NetworkInfoSubnetId                        = "/subscriptions/$subscriptionID/resourceGroups/$resourceGroupName/providers/Microsoft.Network/virtualNetworks/$vnetName/subnets/$subnetName"
14    DomainInfoJoinType                         = "ActiveDirectory"
15    ActiveDirectoryInfoDomainName              = "poffers.cloud"
16    DomainCredentialsUsernameKeyVaultSecretUri = "https://$vaultName.vault.azure.net/secrets/DomainAdminUser"
17    DomainCredentialsPasswordKeyVaultSecretUri = "https://$vaultName.vault.azure.net/secrets/DomainAdminPass"
18    VMAdminCredentialsUsernameKeyVaultSecretUri = "https://$vaultName.vault.azure.net/secrets/VMAdminUser"
19    VMAdminCredentialsPasswordKeyVaultSecretUri = "https://$vaultName.vault.azure.net/secrets/VMAdminPass"
20}
The whole script can be found in my Azure Virtual Desktop repo.
When you have changed every necessary value you can deploy the script, but first do a
connect-azaccountand make sure you use an account that have all the necessary rights to deploy the script.
Let's deploy.
Now that we have inserted the right values it will be good to deploy the script.
- Go to the location where you have stored your files and keep in mind that you need to set the location of the .bicep and .bicepparam in the script. In the example below I have set the location of the files in the same folder as my script, so when I run the script it knows it is in the same folder.
1az deployment sub create `
2    --name $deploymentID `
3    --location $location `
4    --template-file ./sessionhost-config.bicep `
5    --parameters ./sessionhost-config.bicepparam `
6    --parameters updatedBy=$updatedBy location=$location locationShortCode=$LocationShortCode productType=$productType environmentType=$environmentType `
7    --confirm-with-what-if `
Use the command
.\deploy-sessionhost-config.ps1 -subscriptionID "" -location "westeurope" -productType "avd" -environmentType "prod" -deployin your powershell window and again run it in the directory where the deploy-sessionhost-config.ps1 is stored. Check your own existing environment for the naming convention. If your Resource Group is called "rg-avd-acc-weu" then you need to use that in your commandline. Put in your own subscriptionID.When you run the command and check the output of the deployment from the What-If statement, you can deploy the Bicep. It will deploy the Key-Vault and set the Secrets. Immediatly after that it will set the necessary rights on the Key-Vaults and existing Resource Group.
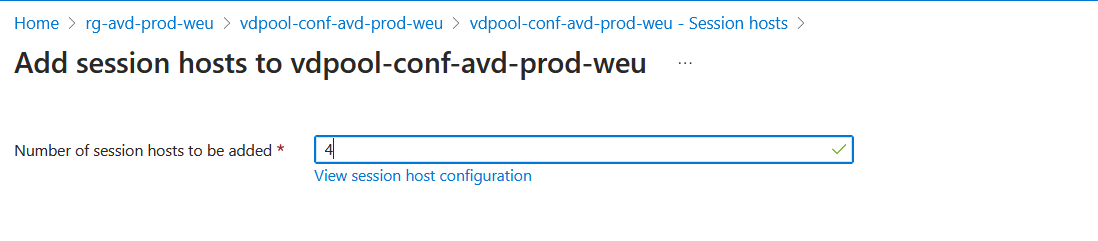
Click on the created hostpool and click on machines where you can choose to add machines, in my example i will choose 4. Because of the Session Host Configuration enabled hostpool, you don't need an registration key. Unfortanatly i didn't find a command to automate the deployment for the sessionhost, so for now I will do it trough the Azure Portal. Of course I will update this when this can be automated.
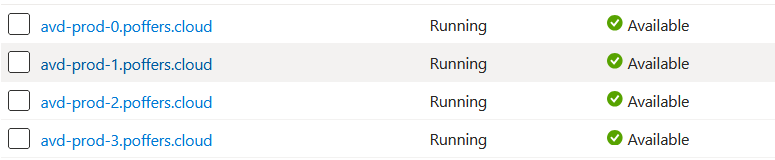
When the deployment is done you will see every machine domain joined and available:
Conclusion
There are a couple of things you need to think about before using this. Normally i would deploy everything with Bicep and use the Azure Verified Modules when this is possible, but because this is in preview, Azure Verified Modules is not ready for these settings. So you can create maybe a custom module in Bicep but i found it more easier to do this with a combination of Bicep calling existing resources and deploy the rest with a Powershell Script.
The plus side of using this Hostpool configuration is definitely less administration, you don't have to set a registration code, you have set the specific configuraton with the Powershell script and you only need to add the number of hosts in the portal you want to add.
The next time I will write something about the Dynamic Scaling plan that you can use in this Hostpool configuration. Thanks for you visiting and reading my blog, see you next time!